vue3创建组件的过程探究
vue3中,我们执行createApp到底发生了什么呢,接下来,我们来一步一步的捋一下。
创建vue实例时,我们经常使用createApp(),然后通过ceateApp函数返回的app对象,来使用mount()来挂载我们的组件。接下来,我们来看一下createApp()和mount()在源码中的执行流程。
createApp
我们使用createApp(),使用的是vue源码中runtime-dom/src/index.ts文件导出的createApp函数。
调用runtime-dom/src/index.ts中导出的createApp函数。
createApp()中调用ensureRenderer( )
ensureRenderer( )中调用createRenderer( )
createRenderer( )中调用baseCreateRenderer(),baseCreateRenderer返回{hydrate, createApp: createAppAPI(render, hydrate)}
最后实际上我们调用的是createAppAPI( )中返回的createApp函数。
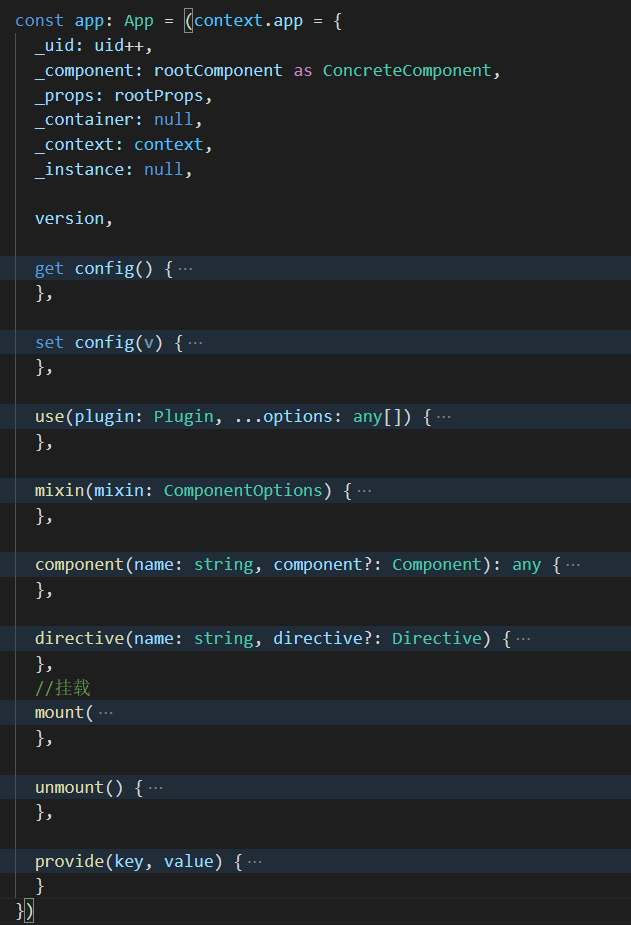
最后执行完createApp以后,返回app对象,app对象中包含mount,use,mixin,component,directive,provide等全局api方法。 createApp函数中为我们返回一个App对象。该对象中包含了我们要使用的全局方法。
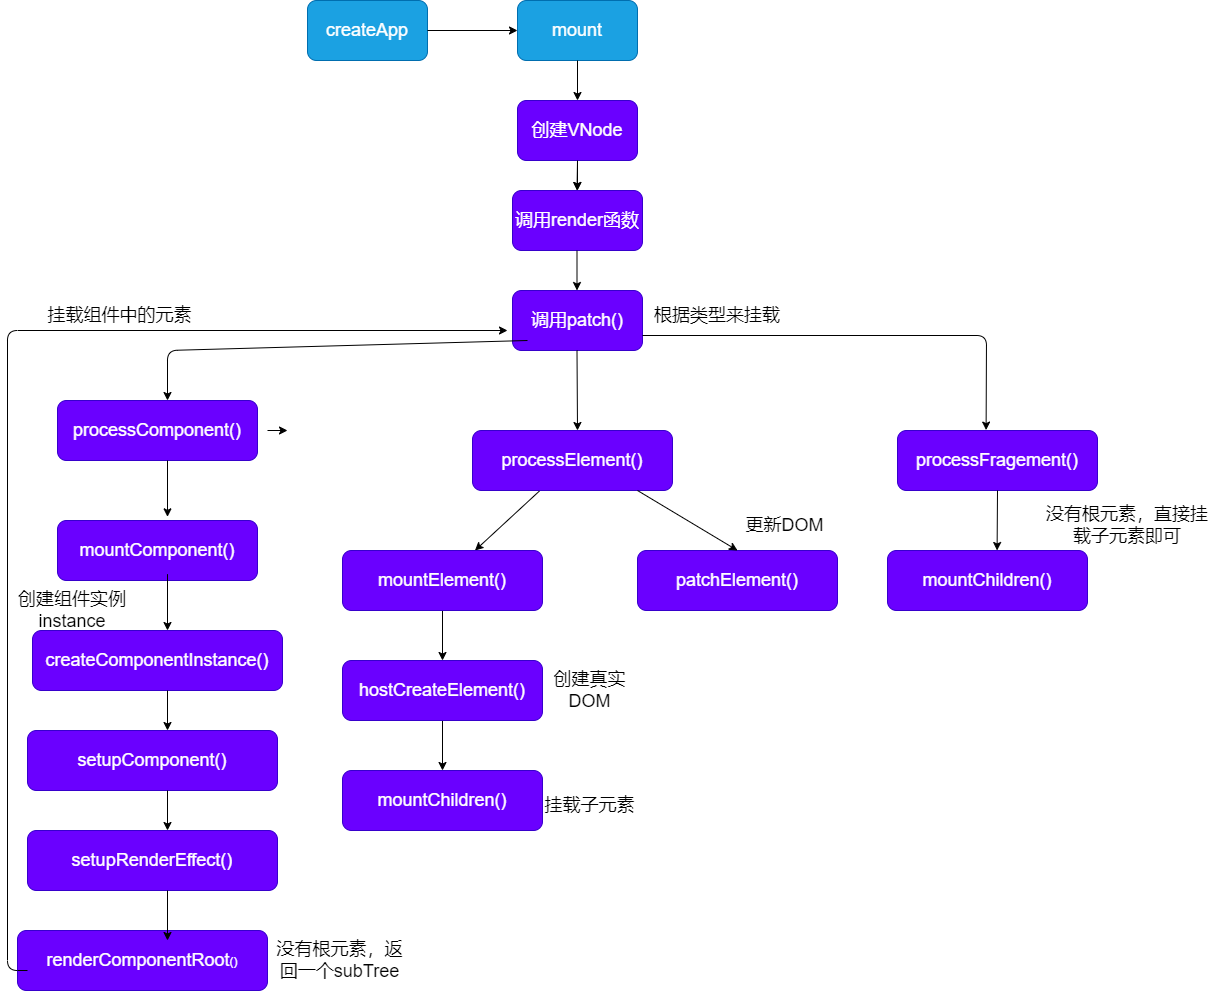
执行mount
- 执行createApp中的mount()函数
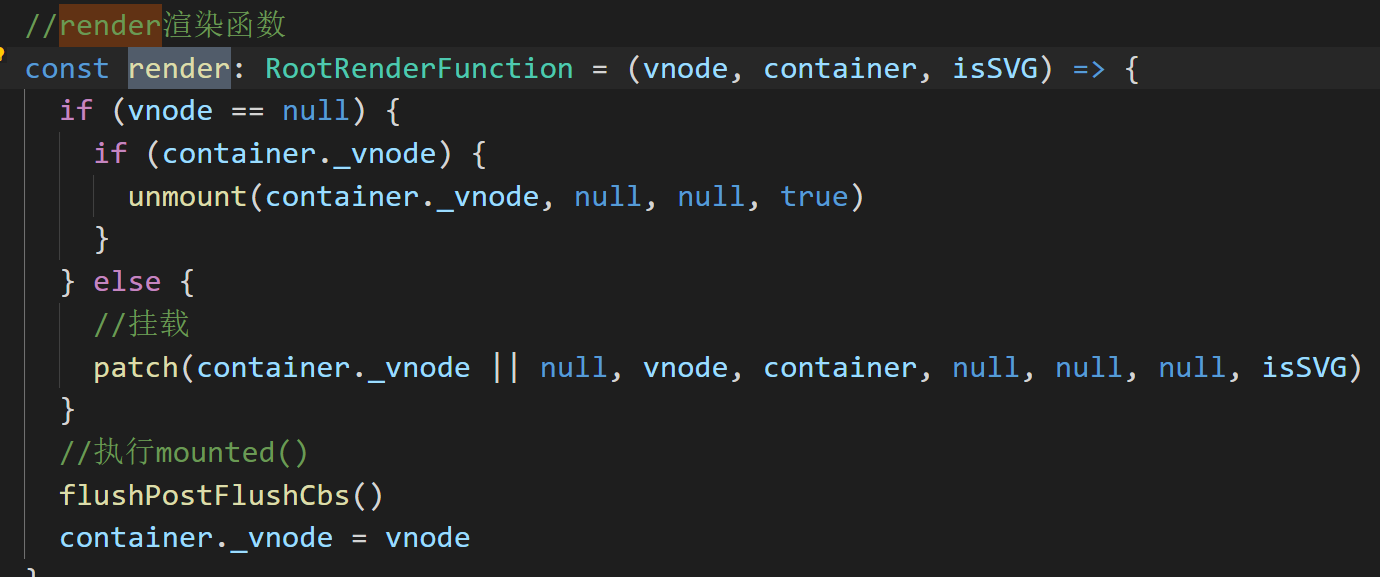
- mount()中先创建VNode,然后再调用render()函数
- mount中调用baseCreateRenderer返回值中的render()渲染函数。
- 如果新创建vnode不为null,则执行patch(),挂载vnode.
- patch()中会进行类型判断,在这里我们是一个组件,因此执行processComponent
- 是组件则执行processComponent。
- 是元素则执行processElement
- 是fragement则执行processFragment
- 执行processComponent中的mountComponent()
- **mountComponent()**中先执行createComponentInstance(),创建组件实例,然后执行setupComponent(),初始化组件实例。
- 调用设置和渲染有副作用的函数,setupRenderEffect()
- 执行renderComponentRoot(),如果没有根元素,则获取到subTree。(subTree是用Fragement包裹的所有元素)
- 执行patch函数
- 有根元素,则执行processElement().
- 如果有n1(旧vnode)为null,则执行mountElement,否则执行patchElement.
- mountElement中根据vnode,通过hostCreateElement()创建真实的element.
- 如果有子元素,则通过mountChildren()挂载子元素,遍历所有的子元素进行挂载。
- 最后通过hostInsert(),将el挂载到container中。
挂载流程:
setupComponent初始化实例
- 处理props和attrs
- 处理slots
- 执行setup()
- 经过complie()编译tempalte,将template模板转为render函数。
- 调用applyOptions()对vue2中options API 进行处理。
complie
经过complie后,我们的template模板会被编译为render函数;
_createElementVNode()相当于h()函数。
在vue中数据的更新是组件级别的,
//模板
<template id="app">
      <span>你好啊</span>
      <div>静态的元素</div>
      <div>{{count}}</div>
      <button @click="fn">+1</button>
</template>


//转为的render函数
(function anonymous(
) {
const _Vue = Vue
const { createElementVNode: _createElementVNode } = _Vue


/* 作用域提升
由于组件的挂载和更新都是要执行render函数的,又因为_hoisted_1,_hoisted_2中都没有引用动态的变量,是不会改变的,因此不用每次执行render函数都再次创建静态的vnode,所以这里做了作用的提升,不用每次都执行,提高了性能。
*/


const _hoisted_1 = /*#__PURE__*/_createElementVNode("span", null, "你好啊", -1 /* HOISTED */)
const _hoisted_2 = /*#__PURE__*/_createElementVNode("div", null, "静态的元素", -1 /* HOISTED */)
const _hoisted_3 = ["onClick"]

//生成的render函数
return function render(_ctx, _cache) {
  with (_ctx) {
    const { createElementVNode: _createElementVNode, toDisplayString: _toDisplayString, Fragment: _Fragment, openBlock: _openBlock, createElementBlock: _createElementBlock } = _Vue


/* blockTree
	由于patch和diff算法中,我们不需要diff静态结点,因此这里我们可以将动态的节点,添加到一个数组中,我们只diff这个数组中即可。
	openBlock()方法就是创建了一个数组,用于保存动态的节点。
	当我们更新组件时,我如果我们有blockTree,那么它将仅仅patch block即可。这样我们需要对比的vnode会减少,因此可以提高性能。如果没有blockTree,它将直接patch children,这样性能肯定是比较差的。

*/
    return (_openBlock(), _createElementBlock(_Fragment, null, [
        //四个vnode,前两个做了提升,后面两个没有提升
      _hoisted_1,
      _hoisted_2,
      _createElementVNode("div", null, _toDisplayString(count), 1 /* TEXT */),
      _createElementVNode("button", { onClick: fn }, "+1", 8 /* PROPS */, _hoisted_3)
    ], 64 /* STABLE_FRAGMENT */))
  }
}
})template中数据的使用顺序
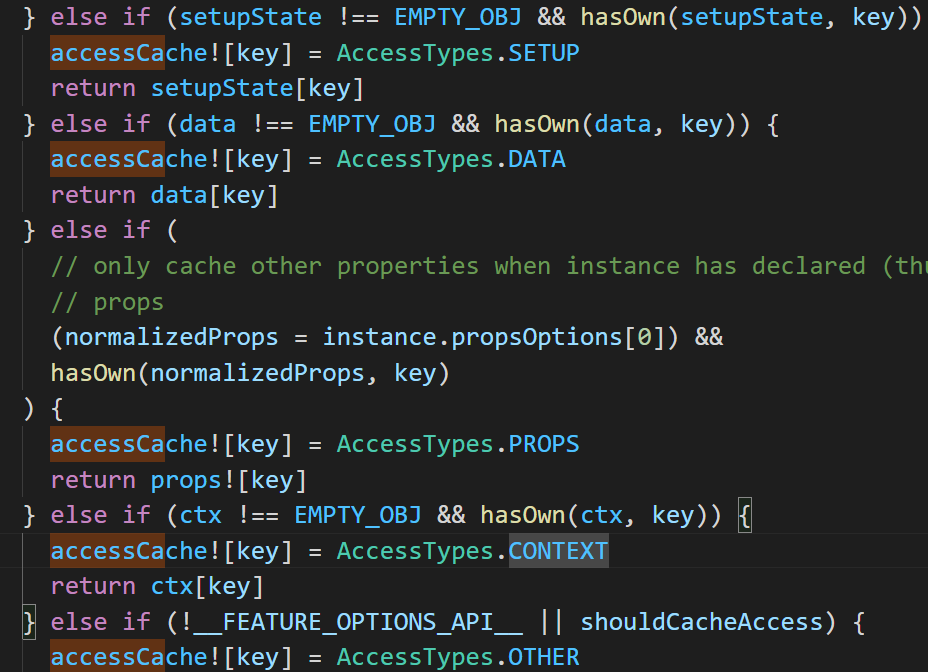
由图可知:当我们存在变量名冲突时,使用顺序为:
- setup()
- data
- props
- ctx中的methods或computed
组件的VNode和组件的instance
- VNode是组成虚拟DOM树
- 组件实例上保存了我们使用的状态和方法。
声明周期钩子
调用applyOptions(),初始化实例对象,该函数一开始就回调beforeCreated();
初始化完成后回调created()函数。
其他声明周期会先注册
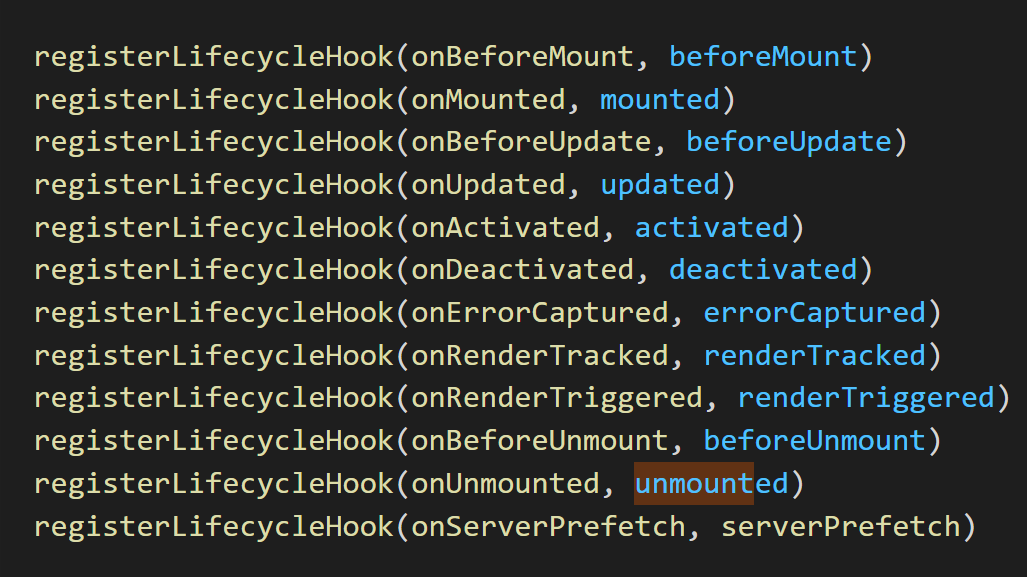
其他的生命周期函数都是在setupRenderEffect()函数中调用的。
并且由于mounted(),updated(),unmounted()这几个生命周期函数不是立即执行的,不能明确什么时候执行完毕,因此通过queuePostRenderEffect()函数将他们放入了一个队列当中,当执行完以后再通过render()中的flushPostFlushCbs()来回调相应的生命周期函数。